The Galaxy S7 and S7 Edge have outstanding features, including a QHD Super AMOLED display, Qualcomm Snapdragon 820 or Exynos 8890 CPU, Adreno 530 or Mali-T880 MP12 GPU, 4GB RAM, 32GB internal storage, microSD slot, 12MP rear camera, 5MP front camera, and Android 6.0.1 Marshmallow.
If you have a Galaxy S7 or S7 Edge and haven’t rooted it yet, you’re not utilizing its full potential. By gaining root access, you can tweak the phone’s behavior, performance, battery usage, and GUI based on your preferences. It’s a must-have for advanced Android users.
Custom rooting apps and recovery provide additional features, including backup and modification of the Android system. Galaxy S7 and S7 Edge have root access and custom recovery support. Follow this guide to flash TWRP custom recovery and gain root access on the Samsung Exynos models.
Samsung Exynos and Custom Recovery Guide
This guide is bound to work with the following variants of the Galaxy S7 and Galaxy S7 Edge.
| Galaxy S7 | Galaxy S7 Edge |
| SM-G930F | SM-G935F |
| SM-G930FD | SM-G935FD |
| SM-G930X | SM-G930X |
| SM-G930W8 | SM-G930W8 |
| SM-G930K (Korean) | SM-G935K (Korean) |
| SM-G930L (Korean) | SM-G930L (Korean) |
| SM-G930S (Korean) | SM-G930S (Korean) |
Early preparations
- Charge your Galaxy S7 or S7 Edge to at least 50% to prevent battery problems during flashing. Confirm your device’s model number found under Settings > More/General > About Device.
- Enable OEM Unlocking and enable USB debugging mode on your phone.
- Get a microSD card to copy the SuperSU.zip file to, or you’ll have to use MTP mode while booting into TWRP recovery to flash it.
- Back up crucial contacts, call logs, and SMS messages, and move media files to your computer since you’ll have to reset your phone eventually.
- Disable or uninstall Samsung Kies when using Odin since it can interfere with the connection between your phone and Odin.
- Use OEM data cable to establish a connection between your PC and your phone.
- Follow these instructions to the letter to avoid any mishap during the flashing process.
Downloads and installations
- Download and install Samsung USB drivers on your PC: Download Link with Guide
- Download and extract Odin 3.10.7 on your PC: Download Link with Guide
- Now, download the TWRP Recovery.tar file carefully according to your device.
- Download the SuperSU.zip file and copy it to your phone’s external SD card. If you don’t have an external SD card, you’ll need to copy it to internal storage after installing TWRP recovery.
- Download the dm-verity.zip file and copy it to your external SD card. Alternatively, you can copy both.zip files to a USB OTG if you have one.
TWRP and Root Galaxy S7 or S7 Edge: Guide
- Open the Odin3.exe file from the extracted Odin files that you downloaded above.
- To enter download mode, power off your Galaxy S7 or S7 Edge and hold down the Power, Volume Down, and Home buttons. Once your device boots up and shows a Downloading screen, release the buttons.
- Connect your phone to your PC and wait for Odin to display an “Added” message in the logs and blue light in the ID: COM box, indicating a successful connection.
- Now click on the “AP” tab in Odin and select the TWRP Recovery.img.tar file according to your device carefully.
- Choose only “F.Reset Time” in Odin. Do not select “Auto-Reboot” to prevent the phone from restarting after flashing TWRP recovery.
- Choose the right file and options, then click the start button. It will take a few minutes for Odin to flash the TWRP and display a PASS message.
- Once done, disconnect your device from your PC.
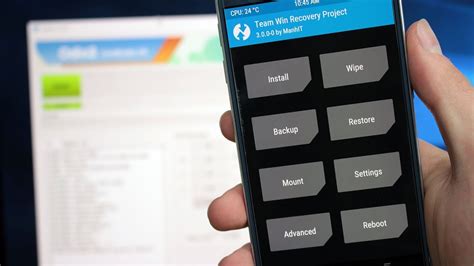
- For direct booting into TWRP Recovery, power off your phone and simultaneously press the Volume Up, Home, and Power keys. Your phone should automatically boot into the new custom recovery.
- Swipe right when prompted by TWRP to activate modifications. This enables dm-verity, which must be disabled promptly to modify the system correctly. This step is integral to rooting the phone and modifying the system.
- Select “Wipe,” then tap “Format Data” and enter “yes” to disable encryption. This is crucial for resetting your phone to its original state, so ensure that you’ve saved all necessary data.
- Return to TWRP Recovery’s main menu and select “Reboot,” then “Recovery” to reboot your phone once more in TWRP.
- Before continuing, transfer the SuperSU.zip and dm-verity.zip files to your external SD Card or USB OTG. If you haven’t, use MTP mode in TWRP to transfer them. After acquiring the files, flash the SuperSU.zip file by selecting “Install” and locating it.
- Now once again tap “Install > locate the dm-verity.zip file > flash it”.
- Once done flashing, reboot your phone to the system.
- That’s all. You’re rooted and have TWRP recovery installed. Best of luck.
You’re done! Back up your EFS partition and create a Nandroid backup to unleash your phone’s true power. I hope this guide was helpful!
Feel free to ask questions concerning this post by writing in the comment section below.


