Learn how to easily install TWRP Recovery on your Samsung Galaxy using Odin with our step-by-step guide. We’ll also cover how to flash stock firmware and root your device for even more customization possibilities. Upgrade your Samsung Galaxy today!
After CWM recovery became obsolete, TWRP became the primary custom recovery tool for Android development due to its superior features and continued development. Its touch interface makes the UI more interactive and user-friendly than previous options.
Using TWRP recovery doesn’t require any prior knowledge of Android development or power usage. Simply install it on your phone and utilize its features, such as flashing files, without any complications.
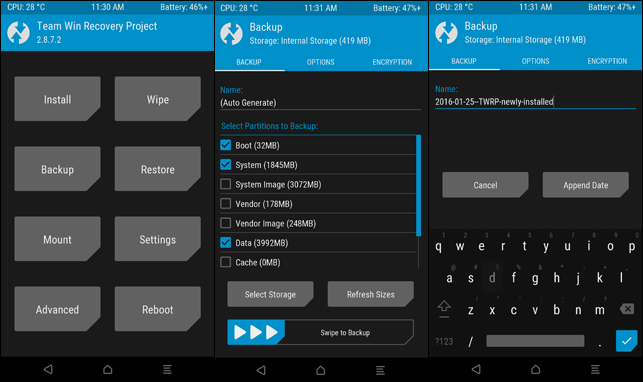
Custom recoveries, such as TWRP, enable users to flash files like Custom ROMs, SuperSU, MODs, and Tweaks, as well as wipe cache, Dalvik cache, and the system of the phone. Additionally, TWRP allows for the creation of a Nandroid backup.
TWRP also can mount different storage partitions while booted into recovery mode. Although there are many uses for custom recoveries, these features provide a basic understanding of its functionalities.
There are various methods to install TWRP recovery, including flashing it as a .img file through ADB commands, using a .zip file, or utilizing apps like Flashify to flash it directly on your phone. However, Samsung devices are particularly easy to flash TWRP recovery on.
For Samsung Galaxy smartphones, flashing TWRP recovery is as simple as using an img.tar or .tar file in Odin. This tool has made it easy for users to install custom recoveries, root their phones, or even flash stock firmware. When in distress with your phone, Odin can act as a life savior by performing the necessary actions for recovery.
To install TWRP Recovery using Odin, follow a few simple steps that we have outlined below. Take a look and learn how to install/flash TWRP recovery on your Samsung Galaxy device now.
Disclaimer: TechBeasts and the recovery developers cannot be held responsible for any mishaps. Perform all actions at your own risk.
Installing TWRP Recovery using Odin: A Guide
- Ensure that you have downloaded and installed the Samsung USB drivers on your PC.
- Enable USB debugging mode and OEM Unlocking on your Samsung Galaxy smartphone.
- Download and extract Odin3 to your preference. For Galaxy models before the S7/S7 Edge, any version of Odin from 3.07 to 3.10.5 is acceptable.
- Download the TWRP recovery in .img.tar format that is compatible with your device.
- Copy the TWRP recovery file to your desktop.
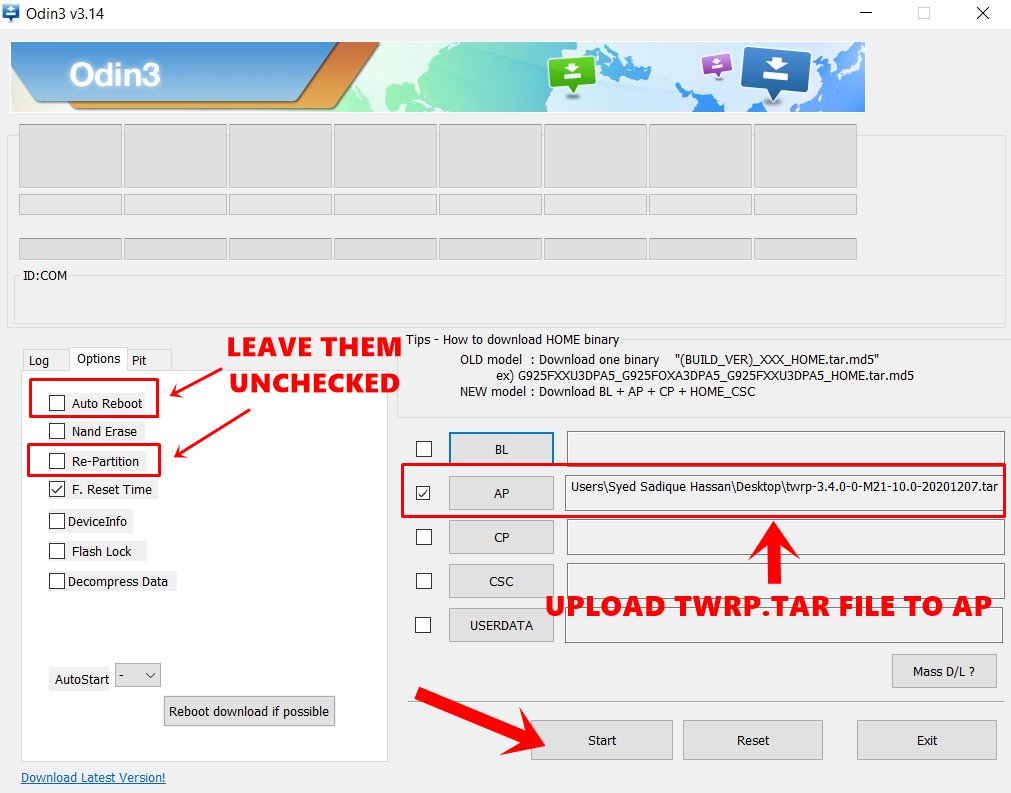
- Launch Odin.exe and select the PDA or AP tab.

Select the TWRP-recovery.img.tar file in the PDA tab. Note that the image shown here is for reference only, and you should not be confused with the file displayed in the PDA tab. - When a small window appears, choose the recovery.img.tar file.
- Odin will begin loading the recovery file. The only options that should be active in Odin are F.Reset.Time and Auto-Reboot. Ensure all other options are unchecked.
- After the recovery file has been loaded, put your phone in download mode by turning it off completely, and then turning it on while holding the Volume Down + Home + Power keys. When you see a warning, press Volume Up to continue. Connect your phone to your PC in download mode.
- Connect the data cable to your device while in download mode.
- When the connection is successful, the ID: COM box in Odin will turn blue or yellow, depending on your version of Odin.
- Click the Start button in Odin and wait while it flashes the recovery. Once the process is complete, your device will reboot. Disconnect your phone and boot into recovery mode by pressing the Volume Up + Home + Power keys.
- That’s the end of the process.

After flashing the TWRP recovery, remember to create a Nandroid backup.
That concludes the process. Next, learn how to flash stock firmware on Samsung Galaxy with Odin and how to root Samsung Galaxy using CF-Auto-Root in Odin.
Feel free to ask questions concerning this post by writing in the comment section below.


