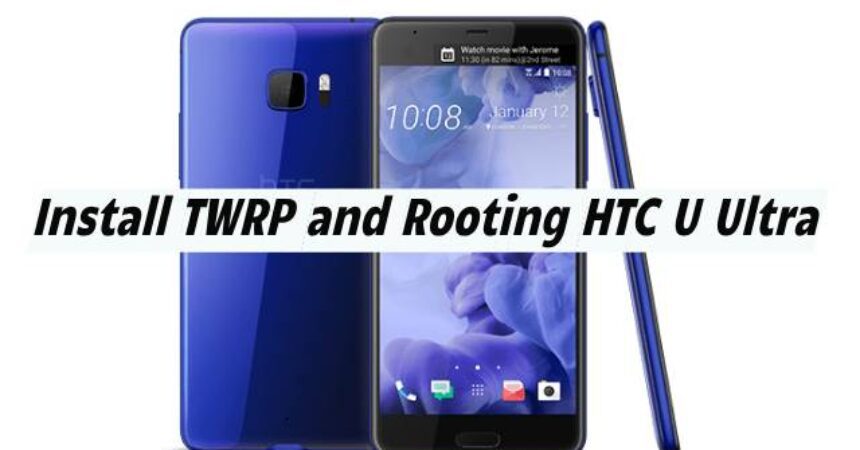
The HTC U Ultra has recently been granted TWRP recovery support. By installing TWRP on your HTC U Ultra, you can promptly root your device, unlocking further customization opportunities.
Approximately a month ago, HTC unveiled the U Ultra. This smartphone features a 5.7-inch QHD display, protected by Corning Gorilla Glass 5 and Sapphire crystal glass in the 64GB and 128GB variants, respectively. The device boasts a secondary 2.05-inch display as well. Powered by the Snapdragon 821 CPU and Adreno 530 GPU, the HTC U Ultra comes with 4GB RAM and offers 64GB and 128GB internal storage options. The smartphone is equipped with a 12MP rear camera and a 16MP front-facing camera. It houses a substantial 3000mAh battery and runs on Android 7.0 Nougat out-of-the-box. The U Ultra’s arrival has propelled HTC into the high-end smartphone specifications market, marking a significant shift for the company. Before to the U Ultra’s release, HTC faced criticism for lagging behind other manufacturers. Encouragingly, the HTC U Ultra is already gaining traction in the custom Android development community, which bodes well for its users.
The current TWRP recovery version compatible with the HTC U Ultra is 3.0.3-1. To install this recovery, you first need to unlock your phone’s bootloader. Following the custom recovery setup, a systemless root solution will assist you in gaining root access to your device. In this guide, we will walk you through each process step-by-step.
- This guide is only applicable to the HTC U Ultra. Do not try it on any other device.
- Charge your phone up to 50%.
- Backup your important contacts, call logs, text messages, and media content.
- Use the original USB cable to connect your phone to your PC.
- Download and install Minimal ADB and USB drivers on your PC.
You will find the Minimal ADB and Fastboot directory in a specific location: C:\Program Files (x86)\Minimal ADB and Fastboot, and also notice the Minimal ADB and Fastboot.exe file on your desktop
- Download TWRP recovery.img file.
- Rename the recovery file to “recovery.img” only and copy it to the mentioned folder.
- Download and install HTC USB drivers on your PC.
- Enable OEM Unlocking and USB Debugging mode on your phone.
- Unlock the Bootloader of your HTC U Ultra.
- Download the SuperSU.zip file and save it on your PC’s desktop.
- Download no-verity-opt-encrypt-5.1.zip and place it on your PC’s desktop as well.
- Follow the guide attentively.
Disclaimer: Installing TWRP recovery and rooting your HTC U Ultra will change your phone’s status to a custom one. This will prevent it from receiving Over-The-Air (OTA) updates and will void the warranty. To resume receiving OTA updates, you must flash a new stock firmware on your device. Please note that, while following this procedure, you are solely responsible for any potential issues. The device manufacturers will not be held liable in case of any mishaps.
Install TWRP & Rooting Guide for HTC U Ultra
- Connect your HTC U Ultra to your PC.
- Open the Minimal ADB and Fastboot.exe file from your desktop. If you don’t have it, open the Minimal ADB and Fastboot folder and run MAF32.exe.
- In the command window, input the following commands:
- Use the command “adb reboot download” to reboot your device into download mode.
- In the fastboot mode, execute the commands:
- “fastboot flash recovery recovery.img” to install the recovery image.
- “fastboot reboot recovery” to boot into recovery mode (or use Volume Up + Down + Power for direct access).
- This will boot your device into TWRP recovery mode.
- In TWRP, you will be prompted to allow system modifications. Generally, choose to allow these modifications by swiping right.
- Trigger dm-verity verification, then flash SuperSU and dm-verity-opt-encrypt on your phone.
- Perform a data wipe to enable storage and proceed to mount USB storage.
- Connect your phone to your PC and transfer the SuperSU.zip and dm-verity files to your device. Keep the phone in TWRP recovery mode throughout this process.
- Go back to the main menu, locate, and flash the SuperSU.zip file.
- Once SuperSU is flashed, reboot your phone. You have completed the process.
- Upon booting up, find SuperSu in the app drawer and install the Root Checker app to verify root access.x
To manually enter TWRP recovery mode on your HTC U Ultra, first, disconnect the USB cable and completely power off the device by holding the power button for a few seconds. Next, press and hold the Volume Down and Power keys simultaneously until the phone turns on. Once the screen is active, release the Power key but continue holding the Volume Down key. Your HTC U Ultra will now boot into TWRP recovery mode.
Remember to make a Nandroid backup for your HTC U Ultra at this point. Additionally, explore the use of Titanium Backup since your phone is now rooted. If you encounter any issues, feel free to ask for help by leaving a comment below.
Feel free to ask questions concerning this post by writing in the comment section below.


