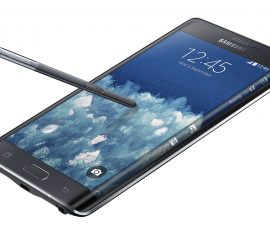
The Samsung Galaxy Tab 2 P3100/P3110
The Samsung Galaxy Tab 2 is a highly popular tablet with the following impressive features:
- Android 4.2.2 Jelly Bean operating system – but this will be the last update received by the device
- 7-inch screen
- 1 GHz dual core CPU
- 1 GB RAM
- 15 mp rear camera
- VGA front camera
- Choice of 8 GB, 16 GB, or 32 GB for the internal storage
- MicroSD slot
For users who are thinking of customizing their device, a custom recovery is a definite must-have. This gives the user the power to root the tablet, flash MODs, create a Nandroid and/or EFS backup, custom ROMs, and aid in fixing a soft bricked device. CWM and TWRP basically provide the same functionality, and their only differentiator is their interface. TWRP also has a few extra capabilities that makes it a preferred option of other customers.
This article will teach you how to install CWM 6.0.5.1 and TWRP Recovery 2.8.4.0 on both variants (the WiFi and GSM) of Samsung Galaxy Tab 2. Here are some notes and things that you need to keep in mind and/or accomplish before starting the installation process:
- This step by step guide will only work for the Samsung Galaxy Tab 2. If you are not sure about your device model, you may check it by going to your Settings menu and clicking ‘About Device’. Using this guide for another device model may cause bricking, so if you are not a Galaxy Tab 2 user, do not proceed.
- Your remaining battery percentage should not be less than 60 percent. This will prevent you from having power issues while the installation is ongoing, and therefore will prevent soft bricking of your device.
- Backup all of your data and files to avoid losing them, including your contacts, messages, call logs, and media files. If your device is already rooted, you may use Titanium Backup.
- Also backup your mobile’s EFS
- Use only your tablet’s official OEM data cable to connect your device to your computer or laptop. There might be connection issues if you try to use other data cables from third party sources.
- Make sure that your Samsung Kies, Antivirus software, and Windows Firewall are turned off when you are using Odin 3
- Install Samsung USB drivers
- Download Odin3 v3.10
- For Galaxy Tab 2 P3100 users: download TWRP Recovery 2.8.4.1 and CWM Recovery 6.0.5.1
- For Galaxy Tab P3110 users, download TWRP Recovery 2.8.4.1 and CWM Recovery 6.0.5.1
Note: The methods needed to flash custom recoveries, ROMs, and to root your phone can result in bricking your device. Rooting your device will also void the warranty and it will no longer be eligible for free device services from manufacturers or warranty providers. Be responsible and keep these in mind before you decide to proceed on your own responsibility. In case a mishap occurs, we or the device manufacturers should never be held responsible.
Step by step installation guide:
- Download the necessary TWRP Recovery or CWM Recovery based on the variant of your Galaxy Tab 2
- Open the exe file of your Odin3 v3.10
- Put the Galaxy Tab 2 in Download Mode by shutting it down and turning it on again by simultaneously long pressing the home, power, and volume down buttons. Wait until the warning appears before clicking the volume up button.
- Connect your tablet to your computer or laptop using your OEM data cable. This has been successfully done if the ID:COM box in Odin turned blue.
- In Odin, click the AP tab and choose the file Recovery.tar
- Ensure that the only option ticked in Odin is “F Reset Time”
- Press Start and wait for the flashing to finish
- Remove your tablet’s connection from your computer or laptop
You have now successfully finished the installation procedure! Simultaneously long press the home, power, and volume up buttons to open the TWRP or CWM Recovery and backup your ROM and do other tweaks on your device.
Rooting procedure for your Galaxy Tab 2
- Download the zip file SuperSu
- Copy the file on the SD card of your device
- Open your TWRP or CWM Recovery
- Click Install then press “Select/Choose Zip”
- Select the zip file SuperSu and begin flashing
- Reboot your Galaxy Tab 2
You may now look for SuperSu in your app drawer. In a few easy and simple steps, you have already installed recovery on your device and provided it with root access.
If you have additional questions or clarifications, just share it through the comments section below.
SC
[embedyt] https://www.youtube.com/watch?v=o3DBVWamJgk[/embedyt]


