Here is a simple guide on how to effortlessly extract factory images of Google Nexus and Pixel phones.
Google compiles the firmware for its Nexus and Pixel devices into Factory Images, which encompass all the essential components required for the phone to operate. These images include the system, bootloader, modem, and data for various partitions that form the core foundation of the software running on your Google-powered phone. Available as .zip files, these factory images can be flashed by issuing a series of commands in ADB and Fastboot mode while your phone is connected to your PC.
Easy Extraction Google Nexus/Pixel Factory Images Effortlessly – Overview
Extracting factory images of Google phones allows for the creation of a system dump, unraveling pre-loaded applications, wallpapers, and other contents embedded within the software. Additionally, these extracted images can be tweaked, enhanced with new features, and repackaged to craft customized ROMs, opening up a realm of possibilities in the vast landscape of Android custom development. For newcomers venturing into the realm of customization seeking to delve into system dumps using extracted factory images, leveraging this tool streamlines the process like never before. Designed to swiftly dissect entire factory images, the tool performs seamlessly on Windows and Linux platforms. Understanding its functionality and embarking on the journey of extracting a Nexus or Pixel system.img factory image is a straightforward process, paving the way for exploration and modification in the world of custom Android development.
If you are new to the world of customization and are interested in obtaining factory images for creating a system dump, you may want to consider extracting the factory images of a Nexus or Pixel device. This process has become easier than ever before with the release of a simple tool that can quickly extract the entire factory images. This tool is compatible with both Windows and Linux platforms. In this guide, we will explain how the tool works and demonstrate how to extract a Nexus or Pixel system.img factory image.
- Obtain a stock firmware factory image of your choice by downloading it from the provided source.
- Utilize a tool such as 7zip to extract the downloaded .zip file.
- Within the extracted .zip file, locate and extract another zip file named image-PHONECODENAME.zip to reveal essential factory images like system.img.
- Download the System Image Extractor Tool on your Windows PC and extract it onto your desktop for further customization.
- Move the system.img obtained in step 3 to the extracted folder of SystemImgExtractorTool-Windows located on your Desktop.
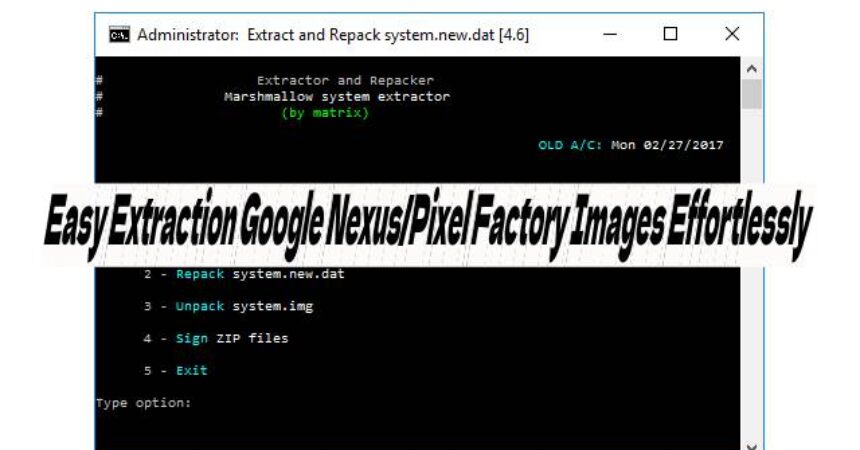
- Next, execute the Extractor.bat file from the SystemImgExtractorTool directory.
- Upon receiving a notification on the Extractor screen, press 3 and then press the Enter key.
- The extraction of the System.img will commence and complete shortly. Once the process finishes, press 5 to exit.
- A system folder will be established within the SystemImgExtractor Tool. Retrieve it to finalize the extraction process. That concludes the procedure.
Origin
Feel free to ask questions concerning this post by writing in the comment section below.


