If you are an experienced user of the Android platform and own an Android device, you are probably familiar with the term “Android ADB Fastboot.”
ADB acts as a bridge between your phone and computer, whereas Fastboot carries out operations in the phone’s bootloader. To execute tasks like loading custom recoveries and kernels, which are comparable elements, Fastboot mode must be activated on the device.
Configuring ADB Fastboot on a Windows PC is a simple process. However, when using them with an Android device on a Mac, it can be more complicated. The competitive relationship between Apple and Google may make someone think that it is an impossible task. Nevertheless, it is entirely possible and easy to do on a Mac.
In an upcoming post, I will provide a detailed account of the process I went through to set up Android ADB and Fastboot on my Mac, accompanied by screenshots. If you have been searching for ADB Fastboot on Mac, you have come to the right place. Without further delay, let’s dive into the driver installation process.
Installing Android ADB Fastboot drivers on a Mac
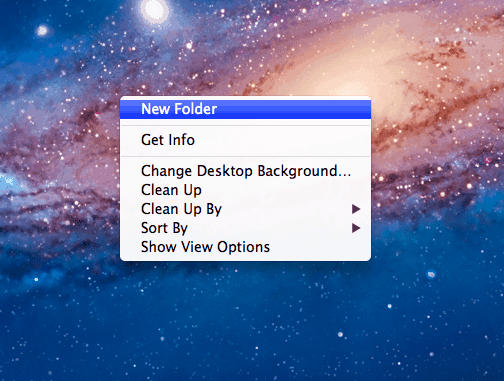
- Create a folder labeled “Android” on your desktop or a convenient location to begin the process.
- Download either the Android SDK tools for Mac or ADB_Fastboot.zip (if you prefer just the essentials).
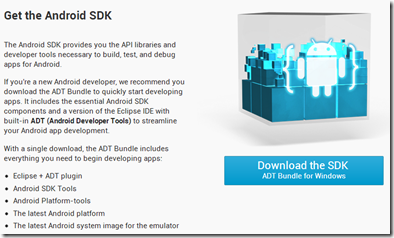
- Extract the adt-bundle-mac-x86 data into the “Android” folder you created on your desktop after downloading the Android SDK.
- After extracting the folder, locate a Unix executable file named “Android.”
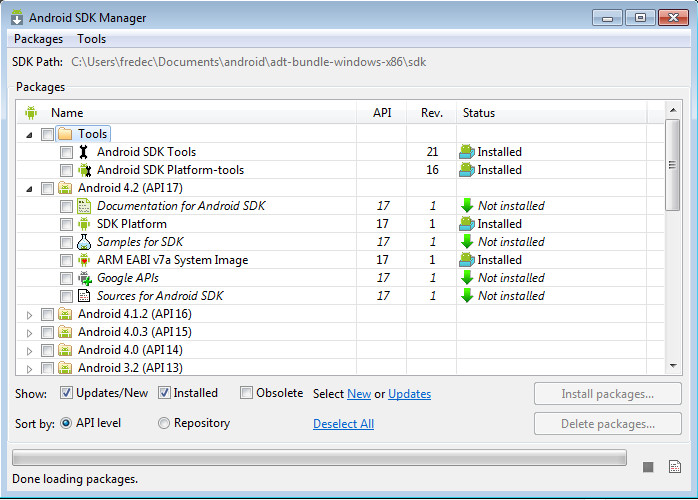
- Upon opening the Android file, ensure that Android SDK and Android SDK Platform Tools are chosen.
- Proceed to click on the install package and await the completion of the download.
- After the download has been completed, navigate to the “Android” folder on your desktop and click on the platform-tools folder within it.
- Next, select both “adb” and “fastboot” within platform tools, copy them, and paste them into the root directory of the “Android” folder.
- And with that, we’ve concluded the installation of ADB and Fastboot. It’s time to evaluate whether the drivers are functioning correctly or not.
- To test the ADB and Fastboot drivers, enable USB debugging mode on your device. Go to Settings > Developer Options > USB Debugging. If Developer Options aren’t visible, activate them by tapping Build Number seven times in Settings > About Device.
- Next, connect your Android device to your Mac, ensuring that you’re utilizing an original data cable.
- Now, open the Terminal Window on your Mac by going to Applications > Utilities.
- Input “cd” into the Terminal Window, followed by the location in which you stored your Android folder. Here’s an example: .cd/Users/<yourusername>/Desktop/Android
- Proceed to press the Enter key so that the Terminal Window can access the “Android” folder.
- To verify that your recently installed drivers are working as intended, you’ll need to input an “adb” or “fastboot” command. You may utilize the following command as an example: ./adb devices.
- Upon execution, the command will display a list of devices that are currently connected to your Mac. To execute Fastboot commands, you’ll need to first start your device in Fastboot mode before performing any desired functions.
- When you execute the command, logs appear on the Terminal Window. “Daemon not working, starting it now on port 5037 / daemon start successfully” means the drivers are working.
- Additionally, the command will display your device’s specific serial number within the Terminal Window.
- To save time and avoid repetitive typing, add ADB and Fastboot commands to the system path. This eliminates the need to type “cd” and ” ./” before using Fastboot or adb commands.
- Open the Terminal Window once again, and execute the following command: .nano ~/.bash_profile.
- Upon executing the command, a nano editor window will appear.
- Within the nano editor window, add a new line containing the path to your Android folder in the Terminal Window, in a format similar to this: “export PATH=${PATH}:/Users/<yourusername>/Desktop/Android.”
- After adding the line, press CTRL + X on your keyboard to exit the nano editor. When prompted, select “Y” to confirm the changes.
- After exiting the nano editor, feel free to close the Terminal Window.
- To verify if the path was successfully added, reopen the Terminal Window and execute the following command.
- adb devices
- Upon execution, the command will display a list of connected devices without requiring the use of “cd” or “./” before the command.
- Congratulations! You have now successfully installed Android ADB and Fastboot drivers on your Mac.
- After installation, retrieve .img files for fastboot mode with commands similar to the previous ones, but using “fastboot” instead of “adb.” Store the files in the root folder or platform-tools folder, depending on your Terminal Window’s directory.
Additionally, you can find a list of useful ADB and Fastboot commands on our website.
Summary
The tutorial has come to an end. If you have any questions or are encountering any obstacles, feel free to leave a comment below. We will make sure to respond as soon as possible.
Feel free to ask questions concerning this post by writing in the comment section below.
