ADB creates a link between your computer and Android Emulator or Device. To experiment with your device, add recoveries, ROMs, and mods, and carry out similar techniques, you need to have ADB and Fastboot drivers installed. Nexus and HTC devices require these drivers in addition to some other devices.
Installing ADB and Fastboot Drivers on Windows PC
If you’re seeking a way to install Android ADB and Fastboot drivers on your Windows PC, you’ve come to the right spot as we will discover today how we can install these drivers.
- The initial step is to download Android SDK Tools from the Android Development Site.
- To enable the Android SDK Manager to function properly on your PC, you need to have Java installed. Download and install Java SE Development Kit 7 for Windows. During the installation of JDK, keep all the options set as default and complete the installation process.
- Open the Android SDK Manager .exe file you downloaded and select C:/ drive for easy future access.

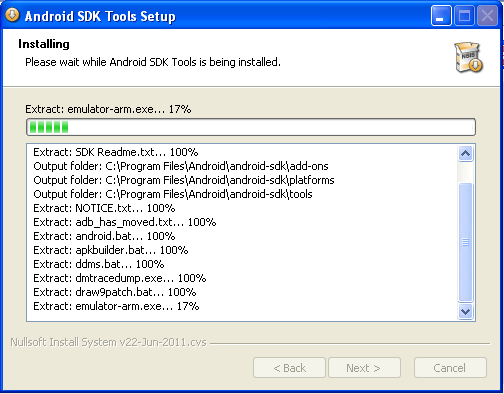
- Finish the installation steps and click on the Finish button to launch the Android SDK Manager.
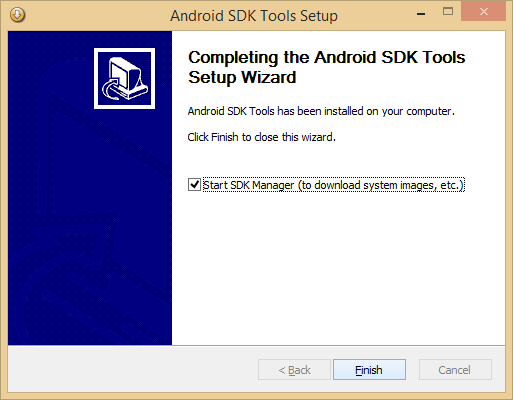
- Once you click on the Finish button, the Android SDK Manager will appear, presenting various features and options. You can simply choose the necessary files and unselect the rest of the options.
- Make sure to select only the Android SDK Platform Tools and Google USB Drivers. The Google USB Drivers can be found at the very bottom under ‘Extras’.
- Once you have chosen the necessary options, you must agree to the Terms and Conditions for both Android SDK Platform Tools and Google USB Drivers before starting the installation process.
- Upon commencing the installation, the Android SDK Manager Log will appear, displaying installation logs.
- Once you see “Done Loading Packages” at the bottom of the Android SDK Manager Logs, you have effectively installed the ADB & Fastboot drivers on your Windows PC. Congratulations!
- To confirm that the drivers have been installed properly, connect your device to the computer. The computer will then automatically detect your device and install the necessary USB drivers.
Make sure to also refer to our guide on installing ADB and Fastboot drivers on Windows 8/8.1 with USB 3.0.
After installing the ADB driver, the Fastboot driver is automatically installed as part of the Android SDK Manager package. Fastboot is an essential tool for making modifications to Android devices, such as flashing custom recoveries and ROMs, modifying the phone’s kernel or bootloader, and other similar actions.
To use Fastboot for modifying your phone, enter Fastboot Mode first. Each manufacturer uses different methods to enter this mode, so it’s important to find the specific method for your device. Entering Fastboot Mode on an HTC device is easy: power off your device, then hold the Volume Down + Power buttons at once.
This will initiate the boot into recovery mode. From there, you can navigate to the Fastboot Mode option by using the Volume Up and Volume Down keys.
Now, we’ll discuss the steps for using Fastboot to flash a custom recovery, image, or ROM onto your Android device.
- Be certain that you have followed the step-by-step instructions outlined above for installing the ADB and Fastboot drivers accurately.
- Navigate to the installation directory of the Android SDK Manager and access the platform-tools folder, for instance, C:\Android-SDK-Manager\platform-tools.
- Duplicate these three files from the Platform-tools directory.
- Return to Drive C and generate a novel directory with the label ‘Fastboot‘. Then, transfer the previously duplicated files – adb.exe, fastboot.exe, and AdbWinApi.dll – into the Fastboot folder.
- Proceed to duplicate an image file (*img) and transfer it into the Fastboot directory.
- Hold shift and right-click anywhere on your desktop, then select “open command window here” from the options.
- Within the command prompt, input “cd c:\fastboot” to change the current directory to the Fastboot folder.
- To avoid using [cd:c:\fastboot], you can open the Fastboot folder and follow these steps: hold down the shift key, right-click inside the folder, and select “open command prompt here.” This method opens the command prompt automatically inside the Fastboot folder.
- Enter the fastboot/download mode on your device.
- Establish a connection between your device and the computer.
- To use Fastboot for flashing a specific image, type a command that indicates the image name and format. For example, “Fastboot Flash Boot Example.img” for an image named “example.img.
- To explore Fastboot’s other functions, type “Fastboot help” in the command prompt and see a list of commands with their specific instructions.
Discover drivers for your additional Android devices here.
We have compiled a list of helpful Android ADB and Fastboot commands for your reference. Additionally, refer to our guide on troubleshooting the “Waiting for device” error in Android ADB and Fastboot. That’s all you need to do after installing ADB and Fastboot drivers. We hope you found this guide useful and share it with your friends. If you have any questions, please leave a comment below, and we’ll do our best to assist you.
Feel free to ask questions concerning this post by writing in the comment section below.
