
The Gummy Custom ROM
It doesn’t look like Samsung is going to release an official update to Android 4.4.2 KitKAt for the AT&T Galaxy S3. However, if you have this device, you can still get a taste of KitKat by installing a custom ROM.
A good custom ROM to use is Android 4.4.2 Gummy. This ROM is based on AOSP and includes hardware key mods, new wallpapers, a status bar mode and also a few performance control options.
In this guide, we are going to show you how you can update an AT&T Galaxy S3 SGH-I747 using Gummy ROM.
Prepare your phone:
- Make sure you have a AT&T Galaxy S3 SGH-I747.
- Make sure that your AT&T Galaxy S3 SGH-I747 is rooted and has the latest custom recovery installed.
- Have a well-charged battery, around 85 percent or more.
- Have a back up of all your important contacts, messages and call logs.
- Enable phone’s USB debugging mode.
- Back up your EFS data.
Note: The methods needed to flash custom recoveries, roms and to root your phone can result in bricking your device. Rooting your device will also void the warranty and it will no longer be eligible for free device services from manufacturers or warranty providers. Be responsible and keep these in mind before you decide to proceed on your own responsibility. In case a mishap occurs, we or the device manufacturers should never be held responsible.
Download:
Install:
- Connect phone to PC.
- Copy and paste downloaded files to root of phone’s SD card.
- Disconnect phone from PC.
- Turn phone off.
- Turn phone back on in recovery mode by pressing and holding volume up, home and power buttons until text appears on-screen.
- Follow one of the two guides below according to which custom recovery you have on your phone.
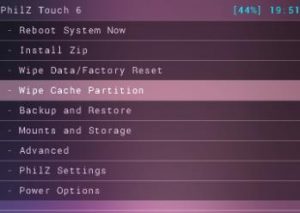
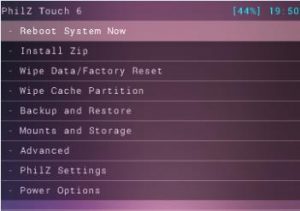
CWM/PhilZ Touch:
- Choose Wipe Cache
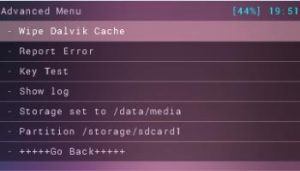
- Go to advance option, choose Delvik wipe cache.
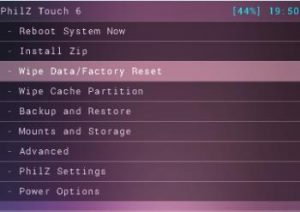
- Choose wipe data/factory reset
- Go to Install zip from SD card. You should see another window open.
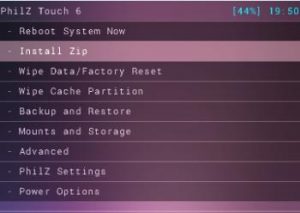
- From options in new window go to choose zip from SD card
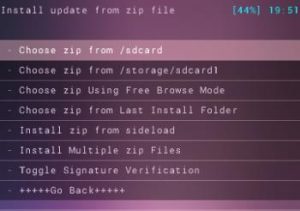
- Select the Gummy ROM.zip file. Confirm installation in next screen,
- After Gummy ROM installation finishes, go back and repeat steps but with Google Apps file.
- When both installations finish, choose +++++Go Back+++++
- Choose to reboot now and the system should reboot
TWRP

- Tap the wipe button. Choose cache, system and data to be wiped.
- Swipe the confirmation slider
- Return to Main Menu. Tap install button from there.
- Find downloaded Gummy ROM and Google Apps files . Swipe slider to install.
- When installation is finished, you will get a prompt to reboot your system now. Do so.
Troubleshooting: Solving signature verification error
- Open recovery
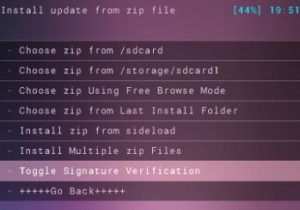
- Go to option install zip from SD card

- Go to Toggle Signature Verification. Press power button to see if it has been disabled or not. If not, disable it. You should now be able to install the zip without error
Have you used Gummy ROM on your device?
Share your experience with us in the comments box below.
JR
[embedyt] https://www.youtube.com/watch?v=sYo1WMWL180[/embedyt]


