The Acer C720 Chromebook
The recently-released Chromebooks are mostly dependent on an internet connection because these function through the cloud. This may come at a disadvantage for people who wish to watch television shows and movies offline, for instance. As such, a lot of users may be disappointed with the limited 16gb SSD that the Acer C720 Chromebook has. For those users with this problem and who wish to upgrade their SSD we have come up with a procedure that you can easily follow in order to replace your SSD on the Acer C720 Chromebook.
Equipment needed

- Prying device
- Philips head screwdriver
- Anti-static wrist strap
Important things to note
- The format used by the standard SSD slot of Acer C720 Chromebooks is M.2 or NGFF. This is different from the common mSATA format used for other laptops.
- The good points with an M.2 or NGFF format is that it has good speed and size
- The MyDigitalSSD drive is a good replacement for you. You can choose between different sizes at very reasonable prizes:
- The32gb SSD can be bought for only $39
- The 64gb SSD can be bought or only $59
- The 128gb SSD can be bought for only $99

- Know that replacing the SSD of your Chromebook will automatically make any warranty void and useless. .
Replacing the SSD
- Set up a recovery disk for your laptop. This is extremely important because the SSD is the one and only drive of your C720 Chromebook and it will be changed with a drive that does not have an operating system.

- Open the Chromebook
- Look for the omnibox and type chrome://imageburner
- Place an SDcard or USB into the drive. The SDcard or USB should have a minimum of 4gb of space
- Read the on-screen prompts and follow the directions for downloading and transforming your removable storage into a recovery disk
- Remove the drive as soon as you have successfully created your recovery disk
- Shut down your Chromebook
- Close the laptop lid and look at the bottom of your Chromebook. You shall see 12 screw holes that hold the bottom plate of your laptop to the chassis. One screw hole is hidden by the warranty sticker.
- Note: The screws are very easy to remove, so take extra care in doing so.
- Place the screws in a container so that you won’t lose them.
- The warranty sticker, since it hides one screw, might be completely destroyed as you remove the screw.

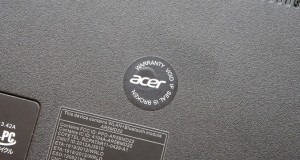

- Remove the bottom plate of your laptop from its base. To do so, you may utilize a flat head screwdriver or a thin metal separation tool.

- You may start from the right area of the fan vent. Wait for the snap point until you can open the plate and remove it with your fingers.
- Take extra precaution with the snap points because it easily breaks.
- You would easily see the SSD as soon as you completely remove the bottom plate. The blue Kingston SSD is located beside the battery and is held in place by one Phillips screw and a slot. Remove the screw from the SSD and slowly remove it from the slot.

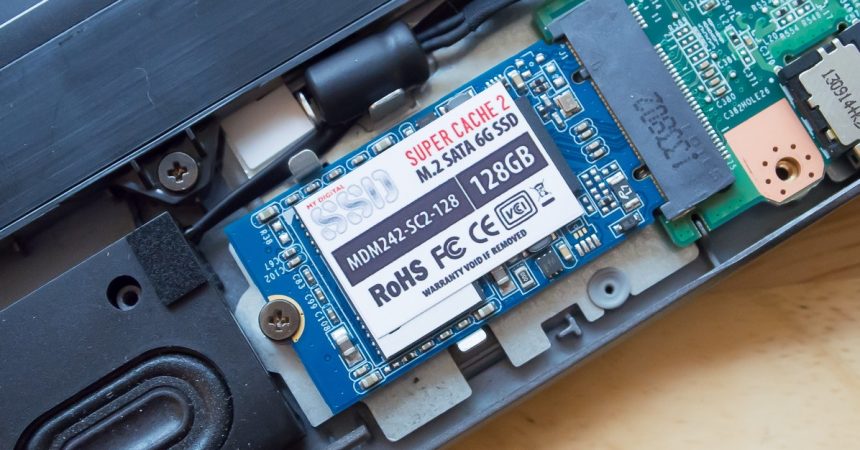
- Place the replacement SSD on the now-empty slot, taking note of the right position of the SSD. If you purchased the MyDigitalSSD slot, then the correct position should have it in the same direction that the Kingston SSD’s brand sticker was facing.
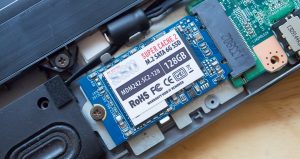
- Place the screw in its position and ensure again that the SSD is properly positioned. This is very important as it would not be a good option to open up your Chromebook all over again.
- Do the process done as you were removing your SSD drive, but this time, do the reverse of the earlier process. Put the bottom plate of your laptop loosely in place and press your finger hard on the edges of the plate. You should be able to hear the plate snap back in place. Ensure that all of the clips are strongly connected to your laptop again to avoid problems later on.
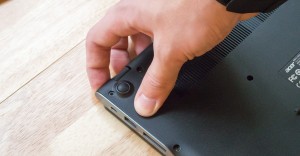
- Retrieve the container where you have securely stored the screws and place them back one by one. As noted earlier, be mindful of remaining gentle as you do this – you wouldn’t want to damage your laptop. Slowly – but surely – place the screws until they are all secured in place. Again, make sure that all 13 screws are brought back to the bottom of your laptop.

- Place your Chromebook in its proper position and open it. As the Chromebook comes to life, the following display message shall appear: “Chrome OS is missing or damaged. Please insert a recovery USB stick or SD card.”

- Insert the recovery disk (USB or SDcard) made during step 1 of this entire process into the right slot. Another message shall appear, informing you that you are about to recover your computer. The restoration process should begin automatically. The screen will display a progress bar to show you how complete the restoration process is.

- Remove the recovery disk (USB or SD card) from the slot. The C720 Chromebook should reboot on its own and a start screen shall appear immediately after.
- Log in as you normally would and input your Google log credentials.
- There will be a “pending system update” that shall download your preferences, settings, and extensions. After this, the drive will be up and running similarly to how it was before you replaced your SSD.
Verifying your new SSD storage
In order to verify if your new SSD storage has the promised additional space:
- Open Files
- Click Settings (this can be found on the top right of your screen)
A dropdown menu will display the storage that your C720 Chromebook now has. In this case, the 128gb will be depleted because of the formatting and other updates done by the Chrome operating system.
Replacing the SSD should take approximately 30 minutes, depending on how fast or slow you are in doing the entire process. The 30 minutes is already a good enough time even for the perfectionists.
If you are one of the people who tried doing the process we illustrated above,
share your experience in the comments section below.
SC
[embedyt] https://www.youtube.com/watch?v=-jOHHyJMgWk[/embedyt]



Hola amigos. Estoy investigando sobre las chromebooks. Les explico mi idea. Es la primera vez que consulto, porque es una página en español y porque muestra coherencia en lo mismo que supongo yo. Quiero comprar otra computadora portatil para mi uso persona,tengo actualmente uina notebook Sony con W10. Una chromebook pesa 1,5 kg, tiene muy buena pantalla y … en un principio pensé en instalarle un hackintosh. La idea de emular una mac pro, a 360 dolares de base, esta muy buena, teniendo en cuenta que hay una HP que tiene una resolucion de pantalla de 3000×1800. Cada vez cerraba mas el asunto. Pero, siempre un pero. El disco que trae, creo no es un SSD habitual, con interface sATA, de los de notebooks normales. Veo por las fotografias de su pagina que es un ssd diferente en una chromebook. Creo que tiene otra interfaz.Estoy muy errado? Supongo que podria instalarsele windows 10 home o inclusive un hackintosh que deberia funcionar bastante fluido. Teniendo en cuenta que esa chromebook de HP tiene un Intel Pentium 4405Y e intel graphics 550. Es la HP 13 G1.
Gracias si leen esta pregunta, que evidentemente uds tienen mas conocimientos tecnicos que yo. Gracias x su tiempo.