The Galaxy Ace 2 I8160
The Android 4.4 KitKat recently released is exclusive for the flagship devices on Android, and it is also limited for those devices that have the Android 4.4 update. In short, users of the Samsung Galaxy Ace 2 will not be receiving the Android 4.4 KitKat, and the release of the Android 4.2.2 Jelly Bean is now also nearing its end. For those who are interested in the said Jelly Bean update, the XXNBI Android 4.2.2 Jelly Bean is available for installation through Samsung Kies or the OTA Update. However, not all are receiving this notification, so manual installation is the only option remaining.
This article will guide you through the step by step process of installing Android 4.2.2 Jelly Bean XXNBI on your Samsung Galaxy Ace 2 I8160. Since the official firmware is unbranded, users from all regions (provided that their device is not locked to any carrier) can install it. It is of utmost importance that you read the procedure carefully, and to follow it concisely. For those who are already familiar with Odin, then this tutorial would just be a walk in the park for you. Rooting your device or having Custom Recovery is not a requirement since this is an official firmware.
Note the following reminders before you proceed with the installation process:
- This tutorial can only be used for Samsung Galaxy Ace 2 I8160. If this is not your device’s model, do not proceed.
- Ensure that your remaining battery percentage prior to the installation is at least 85 percent
- Allow USB debugging mode on your Galaxy Ace 2
- Have a back up of your messages, contacts, and call logs. This will prevent you from unnecessarily losing important data and information in case a mishap occurs during the process. Better safe than sorry.
- Have a back up of the EFS data of your mobile phone to avoid unwanted loss of mobile connectivity.
- The methods needed to flash custom recoveries, ROMs, and to root your device can result in bricking your device. Rooting your device will also void the warranty and it will no longer be eligible for free device services from manufacturers or warranty providers. Be responsible and keep these in mind before you decide to proceed on your own responsibility. In case a mishap occurs, we or the device manufacturers should never be held responsible.
Now that you are all set and ready for the procedure, carefully read the step by step guide to successfully install Android 4.4.2 Jelly Bean on your device. Note that your entire app data will be removed if you upgrade to this ROM from a Custom ROM. Also, do not use Factory Reset using Stock Recovery because it will wipe out all of your content, including your photos and videos.
Installing the Android 4.4.2 Jelly Bean XXNB1 on Galaxy Ace 2 I8160:

- Download Android 4.1.2 I8160XXNB1 for Samsung Galaxy Ace 2 on your computer or laptop.
- Extract the zip file.
- Download Odin3 v3.10.7.
- Shut down your Galaxy Ace 2 and turn it back on while simultaneously pressing the home, power, and volume down buttons until a text appears on the screen.
- Press the volume up button to proceed.
- Make sure that the USB drivers are installed.
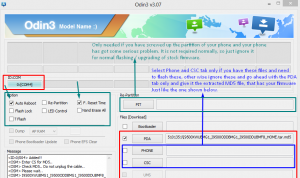
- Open Odin on your computer of laptop
- Connect your Galaxy Ace 2 to your computer or laptop while it is in Download mode. The Odin port should turn yellow with COM port number if this has been properly done.
- Click PDA and look for the file called “I8160XXNBI_I8160XXNBI.md5”. Otherwise, look for the file with the largest size.
- Open Odin and select the options Auto Reboot and F.Reset.
- Press the Start button and allow the installation to finish.
- Your Galaxy Ace 2 will reboot as soon as the installation has been completed. As soon as the home screen appears on your device, unplug your device from your computer or laptop.
Congratulations! You have now successfully upgraded you’re the operating system of your Galaxy Ace 2 to Android 4.2.1 XXNB1 Jelly Bean. If you want to verify this, just go to your phone’s Settings menu and click About.
Upgrading Your Device from a Custom ROM:
As warned earlier, upgrading from a Custom ROM will delete all of your app data. There is also a high possibility that you will be stuck in bootloop. In case this happens, just follow the simple instructions:
- Flash Custom Recovery
- Go to Recovery
- Shut down your Galaxy Ace 2 and turn it back on while simultaneously pressing the home, power, and volume up buttons until a text appears on the screen.
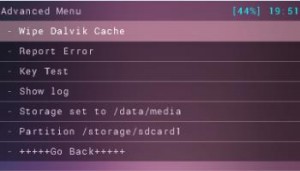
- Click Advance and choose Wipe Devlik Cache

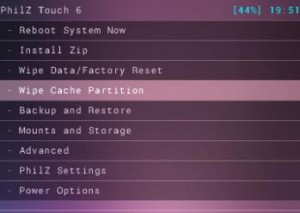
- Go back and choose Wipe Cache

- Click Reboot System Now.
If you have any questions regarding the installation process, do not hesitate to ask through the comments section below.
SC


