Pwnage Tool To Jailbreak A iOS 4.3.1
The Pwnage tool is a pretty good way to jailbreak your iOS 4.3.1. Pwnage is tethered only and you will need to boot into the Jailbroken state each time you reboot. If will work with iPhone 3GS and iPhone 4 as well as some other tools.
In this guide, we’re going to show you how you can jailbreak your iOS 4.3.1. We will be using a combination of PwnageTool 3.2 plus Universal Ramdisk Fixer and tetheredboot utility.
Requirements:
- PwnageTool 4.2
- PwnageTool bundle for iOS 4.3.1
- Universal Ramdisk Fixer
- tetheredboot utility
- Mac OS X
- iOS 4.3.1 firmware
- iTunes 10.2.1
Jailbreak iOS 4.3.1:
- Download PwnageTool bundle and extract Zip file.
- When you’ve extracted the file you should find .bundle file in it. In this particular guide, we will use iPhone 4 bundle iPhone3,1_4.3.1_8G4.bundle. Move that file to the desktop.
- Download Pwnage tool and copy to the applications directory. Right click and Show Package Contents.
- Go to Contents/Resources/FirmwareBundles/ and paste the iPhone 4 bundle iPhone3,1_4.3.1_8G4.bundle file there.
- Download and install Ramdisk Fixer
- Downlaod the iOS 4.3.1 and save it
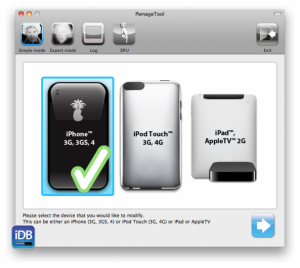
- Start Pwnagetool in Export mode. Select your device.
- Browse for iOS 4.3.1 file that you saved in step 6 and select it.
- Select Build to create a Custom Firmware.
- Pwnage create a .ipsw custom firmware for you. This is already Jailbroken.
- Put device into DFU mode by using Pwnage tool:
- Hold the power and home buttons for 10 seconds.
- Release the power button but keep holding the home button for another 10 seconds
- Your device should go into DFU mode.
- When the custom software is build, open your iTunes. In iTunes, press and hold the alt button then click on Restore
- Select Custom Firmware file then click Open
- Wait for iTunes to install Custom Firmware.
- Download tetheredboot.zip and extract the file.
- Change the extension of Custom Firmware to Zip and extract that .zip file. Copy kernelcache.release.n90 file. Copy iBSS.n90ap.RELEASE.dfu. Both these files should be found under /Firmware/dfu/.
- Move these copied files to the newly created “tetheredboot” folder along with the tetheredboot file.
- Turn off device and start Terminal on OS X
- Run the following command: sudo -s
- Enter administrator password, then type the following:
/Users/TaimurAsad/Desktop/tetheredboot/tetheredboot
/Users/TaimurAsad/Desktop/tetheredboot/iBSS.n90ap.RELEASE.dfu
/Users/TaimurAsad/Desktop/tetheredboot/kernelcache.release.n90
- Drag and drop into the terminal the tetheredboot file, iBSS file and kernelcache.release file.
- You should see some cods running in terminal window. If you are asked to enter DFU mode, do so.
- Wait for device to reboot. When the Terminal shows the Exiting libpois0n message, your device will then be rebooted and booted with Jailbreak tethered Mode.
Have you jailbroken your iOS 4.3.1?
Share your experience in the comment box below.
JR
[embedyt] https://www.youtube.com/watch?v=PqEHNxQEBGY[/embedyt]
