Root Galaxy Note 3 SM-N900V
Every now and then, new devices are being released and rooting techniques are immediately developed every time new devices come up. The most recent root Galaxy Note 3 technique is for Verizon Samsung Galaxy Note 3 SM-N900V. Some rooting tutorials can be found on XDA.
This article will help you through the process of root Galaxy Note 3 SM-N900V. To start with, make sure that all the data in your mobile backed up including, messages, contacts and call logs. This will keep them intact should something go wrong.
Note: The methods needed to flash custom recoveries, ROMs and to root your phone can result in bricking your device. Rooting your device will also void the warranty and it will no longer be eligible for free device services from manufacturers or warranty providers. Be responsible and keep these in mind before you decide to proceed on your own responsibility. In case a mishap occurs, we or the device manufacturers should never held responsible.
Requirements:
You need to get the root package, Root_de_la_Vega-SM-N900V.7z. Check whether you have the right Samsung USB Drivers. You can get them online.
Things to remember:
Put your device in download mode. Enable USB debugging on your device. The battery level should be at least 85%. This tutorial is only applicable on Verizon Galaxy Note 3.
Rooting Samsung Galaxy Note 3 SM-N900V

Installing
- Download and extract all the necessary files.
- Download Odin.
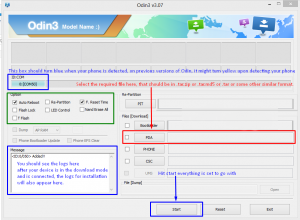
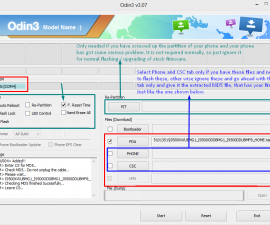
- Access Odin and choose the option like the one showed in the image above.
- Switch off your device and start in Download mode by holding down power and volume down button simultaneously.
- Use USB cable to connect your device to the computer.
- Odin’s port will turn either Yellow or Blue when the drivers are already installed.
- Open PDA and choose the downloaded .tar file.
- Start the process and wait until finish.
- A message that says “Pass” and “Done” will appear after installation.
- Reconnect the device to the computer. Copy the extracted files from “Roo_de_le_vega.zip” and paste to your internal SD.
- Reboot the device and delete the 2 files above from the file manager.
- After deleting, reboot it again. Get a Root checker app to check if it properly rooted.
- Now you completed the process of root Galaxy Note 3
Share your thoughts and questions by leaving a comment below.
EP


