
How To Be An Expert Android Photographer
Smartphone camera is updating day by day so that the users will be able to click amazing shots, however you can be the sole reason of clicking amazing shots without even caring about which smartphone’s camera you are using, android photography is no about using basic mode and basic settings it is much deeper than that if you are willing to step forward leaving behind the beginners photography and wants to move towards being a pro at it then the following points will definitely help you in doing so.
STEADY HANDS:
- The first and foremost thing required for expert photography is steady hands.
- If you have a big fat DSLR in your hand and you want to click a photograph you can never click it while just walking by the scene, you have to stop and steady your hands and then take the best possible shot you can.
- Similarly with Android phone being so small and easy to carry people mistakenly take it as an easy source of taking marvelous pictures; however that is not true you can never take a picture even from an android single handedly while you are walking even in the best lighting.
- All you have to do is wait for a second steady your hands think of the best possible angle and then click the picture to receive the finest results.
- If you are taking a picture might as well take a good one by stopping and steadying yourself and managing things all around you to get the best possible shot
THINK AND SHOOT:
- There was the time in history when taking pictures costed money so people made sure that they don’t let their money go to waste and get the best possible shot.
- However this is not the case now, people nowadays have their own smartphone and they keep on clicking pictures without even caring about lights, framing and composition which are in fact the three basic foundations of a good picture.
- Before taking a picture, see which angel serves you the best or where do you get the best lighting and if you are not satisfied then move a little and then click the photography to achieve desired composition.
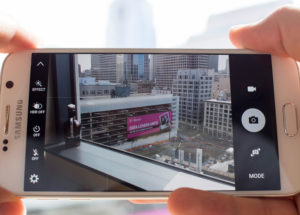
RIGHT MODE:
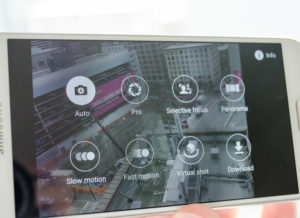
- All smartphones have several different types of modes including party mode, sunset mode, night mode, action mode.
- Try using these modes in your photography and do not always rely on the auto mode.
- If you opt for the night mode it will decrease the ISO and shutter speed making things look much smoother.
- However in action mode it will be complete opposite and you will be required to freeze the objects in motion. The modes will require a lot of practice to get a proper hold on them.
- If you spend some seconds in choosing the right mode rather than auto then it may just give you the best possible result.
POST- PROCESSING:

- No expert photographer just clicks a picture and posts it; they always edit it first and then post it.
- However where smartphone camera is concerned the editing options are vast and gives you a lot of room to play around with the setting may it be just cropping or tweaking the contrast a bit.
- For that you can either use to in-built editing apps or download the best ones to get the desired shot.
USING HDR THOUGHTFULLY:
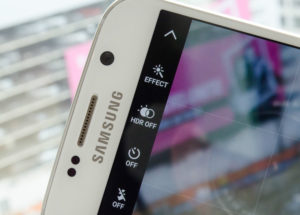
- Turning on the HDR is a nice option to take amazing vibrant and crisp pictures.
- For small gadgets such as smartphone HDR works at its best providing great results.
- It is more efficient to use when the background is bright and you just want to look on the foreground.
- Always keeping your cellphone on HDR mode is definitely not a great option especially during the dark lite scenes.
- Some smartphone cameras will turn on the HDR on their own and will do well.
TRIPOD MOUNT:
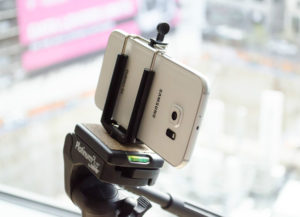
- To maximize the quality of your pictures you can always use the tripod mounts to avoid blurry or distorted images.
- It is a good news that you will not have to buy a special type of a tripod for your smartphone you can always go for adaptable screws which are readily available everywhere.
- You certainly do not want to carry a 70 inch tripod you can always go for smaller more portable ones.
- Setting up your smartphone on the tripod will help you get great picture, it will also be very beneficial during low light circumstances.
- You can also turn your smartphone camera into great time lapse camera with the help of a tripod.
ZOOM IN:
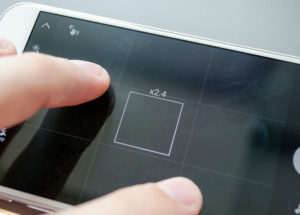
- Most of you guys cannot fight the urge of using the digital zoom in for your cameras which decreases the quality of the pictures by leaps and bounds.
- Getting closer to the your object by digitally zooming in cause blurriness and mostly the pictures are blurred with bad quality.
- There is another option of zooming in and getting the best possible shot and i.e. by using feet all you have to do is just walk over to the object you want to capture and think of a best possible shot and shoot.
- The result will definitely be far better, less blurry and a high quality image will be produced.
CLEANING THE LENS:
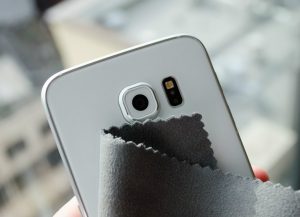
- This is one of the most basic things that most of us forget to pay any heed to even when it is the most significant and basic step to be followed before taking any picture.
- Your smartphone’s camera lens is tiny and usually when you are holding it you leave smudges and dirt on the lens which greatly reduces the quality of the picture.
- Before taking a picture stop for a second use any clothing material to wipe the lens and then see the difference you may as well be very shocked with the result.
Feel free to comment or send in your query in the message box below.
AB
[embedyt] https://www.youtube.com/watch?v=3YoNNpaZ7fw[/embedyt]


